 Cropped
Help
Help / Crop, optimize & export
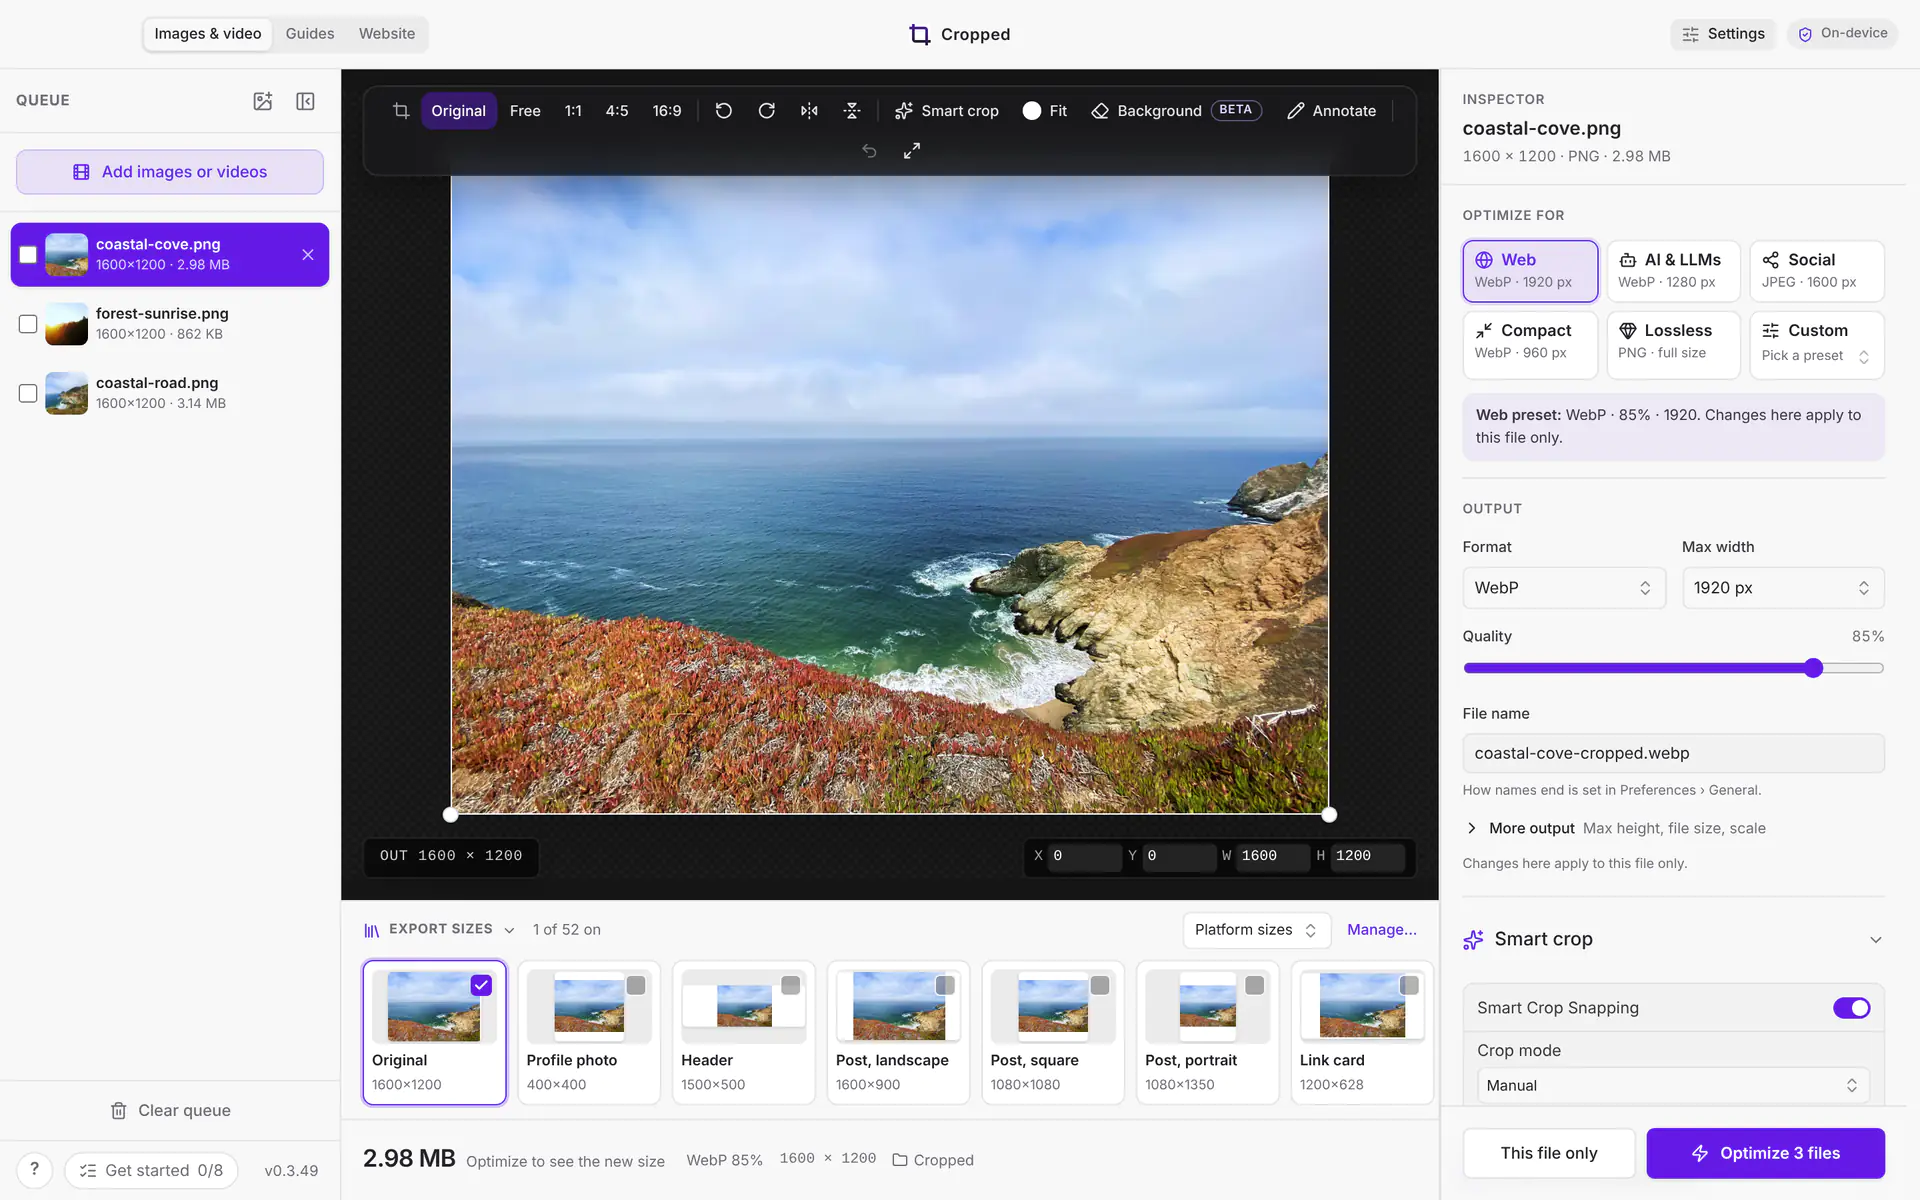
The Studio window
The Studio is Cropped's main window. Use it when you want control: crop each image, trim a video, export several social sizes at once, or pick an exact format and quality. For quick one-step shrinking, use the Drop Zone instead.
Full screen
Click the full screen button at the top right of the Studio, next to On-device, to give the editor the whole screen. Click it again to go back to a window.
- Mac: press ⌃ Control + ⌘ Command + F, choose Window › Enter Full Screen, or click the green button at the top left.
- Windows: press F11 or choose Window › Full Screen.
Your version
The bottom of the queue shows the version you're running, such as v0.3.42 (Cropped Alpha shows v0.3.42α). Click it to check for an update right away; the panel that opens also links to what's new in that version. See App updates for how updates install.
Add files
- Click Add images or videos, or press ⌘ Command + O (Windows: Ctrl + O).
- Or drag files or whole folders onto the Studio window. Files dropped here are added to the queue but not optimized yet, so you can adjust them first.
- Drop a PDF on the Studio window and Cropped saves a smaller copy right away, at the size picked under Preferences › Images › PDFs. See Shrink a PDF.
Dropped pictures show in the queue straight away. While files load, a bar at the top of the queue counts them (Loading 4 of 10), and a file that is still loading shows its preview with a progress bar. You can open, crop and add more files while the rest load.
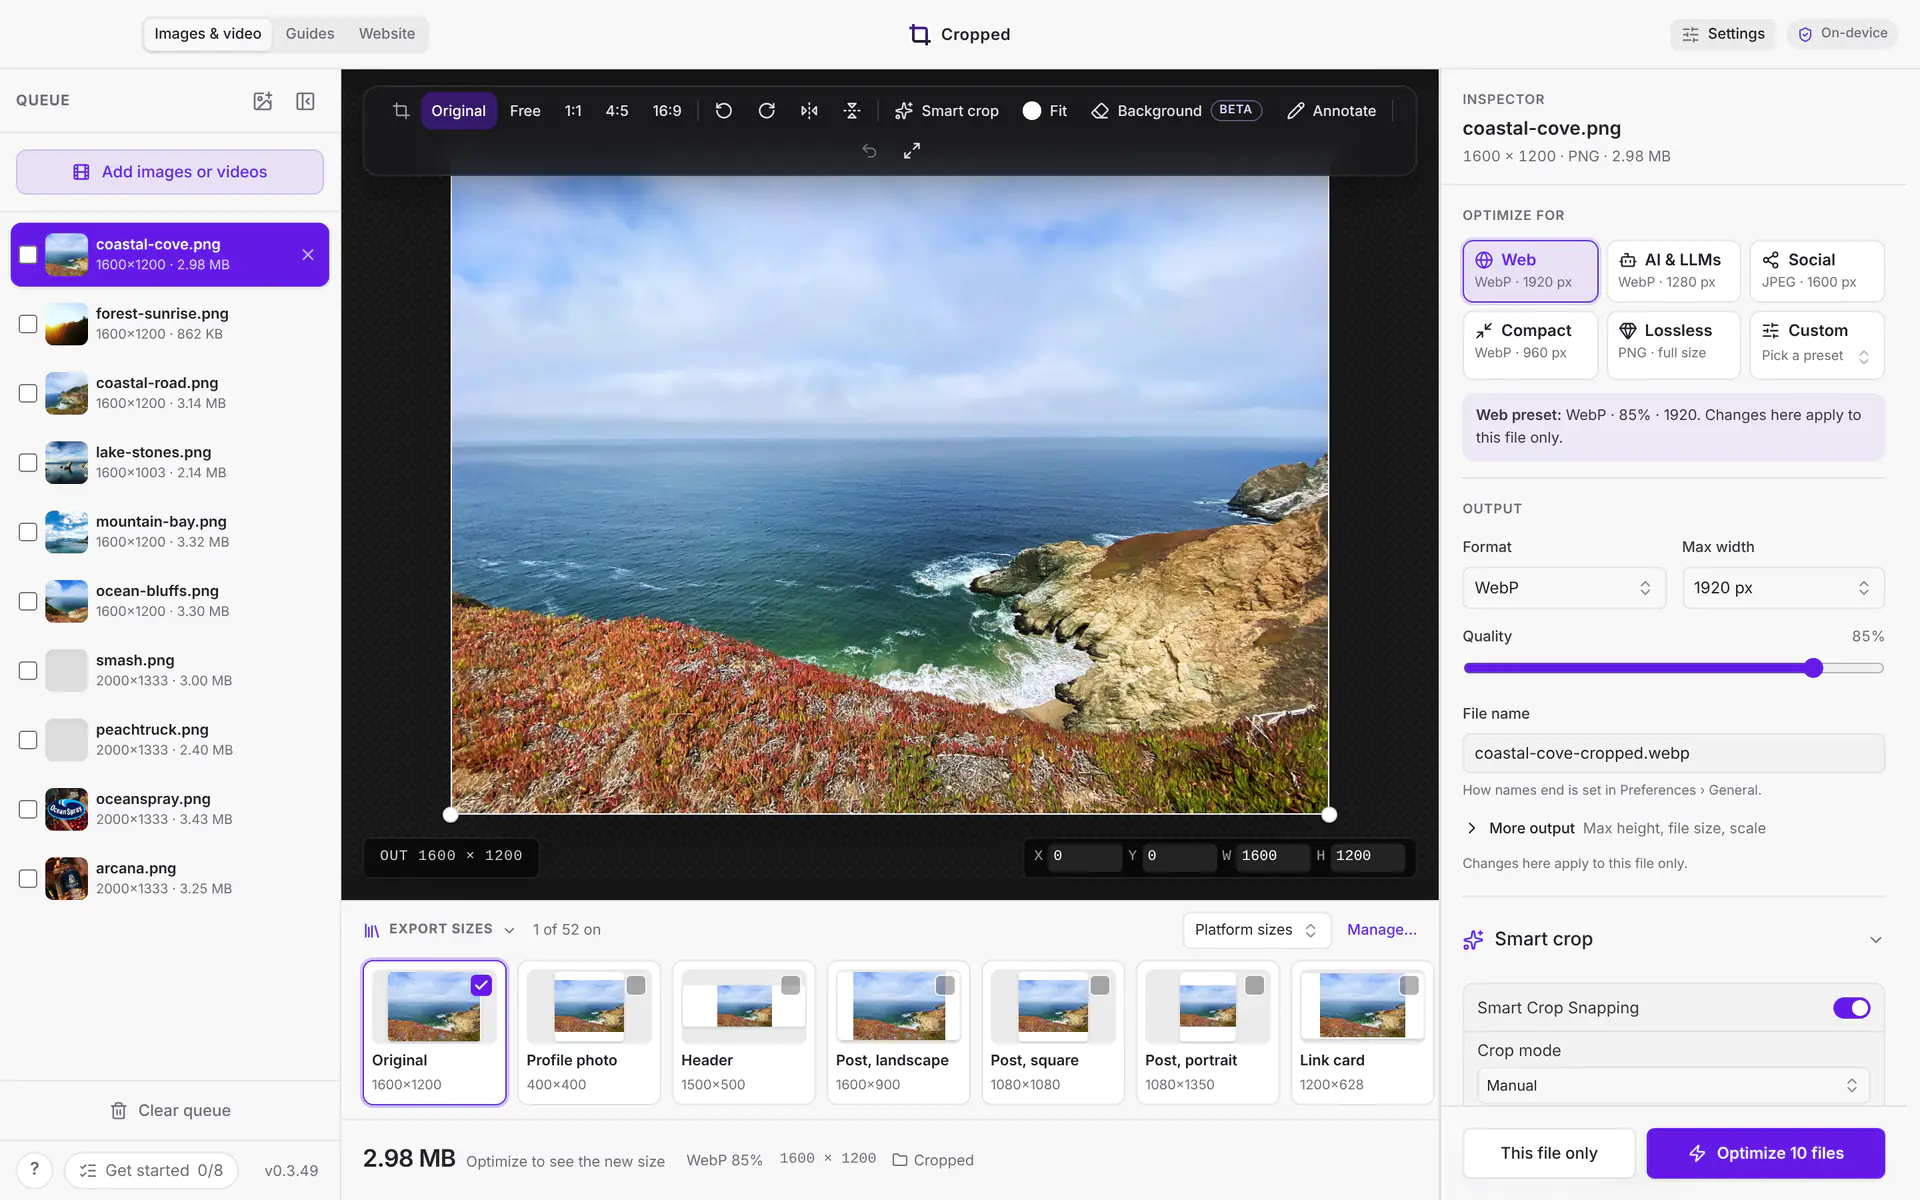
Cropped opens PNG, JPEG, WebP, AVIF and HEIC images, and MP4, MOV, M4V, WebM, MKV, AVI, MPEG and GIF videos. On Windows and Linux, the HEIC reader loads the first time you add a HEIC photo, so that one can take a moment longer.
The queue
The left column lists everything you've added.
Click Collapse media queue in its header for more editor space. A slim rail stays on the left with Expand media queue, an Add files button, the asset count and a thumbnail of every file. Each thumbnail shows how much smaller it got once optimized, and has its own checkbox. Click a thumbnail to open that file. Cropped remembers your choice locally. Collapsing the queue keeps your selected file and edits.
- Click a file to open it. ↑ Up arrow and ↓ Down arrow move between files, and Delete removes the selected one.
- Hover a file to show it in Finder (or File Explorer) or remove it with ✕.
- Tick the checkboxes, then click Apply to Selected to copy the open file's settings to the ticked files of the same type. Crops and trims stay separate for each file.
- At the bottom, a summary shows how much you've saved, plus Clear queue. Retry failed and Clear completed show up once files have finished optimizing and there is something failed or finished. Big totals read in GB, such as 3.0 GB.
The editor
The middle shows the open file.
- Picture toolbar: floats above an open image with the crop shapes, rotate and flip, Smart crop, Background (Beta), Annotate (opens the image in the Annotate window), Frames, Compare, Undo and Reset. See Crop and export sizes.
- Images: drag the crop box and type exact sizes in X, Y, W and H.
- Background removal (Beta): click Background on the picture toolbar, then Remove background to cut out the subject, and keep it see-through or put a color behind it. See Remove a background.
- Export sizes: a row of live previews under the picture, one per size in the chosen collection. See Export sizes.
- Result bar: along the bottom, the size before and after, how much smaller it got, the format and quality, the dimensions and the save folder, with Show in Finder and Save results. The Optimize button is at the foot of the Inspector. See Optimize images.
- Videos: play, crop, trim and pick clips. See Edit videos. To join several videos and images, add music or record a voiceover, see Combine videos. When you drop two or more videos at once, Cropped asks whether to add them Separately or As one edit.
- With your AI app: Claude, Cursor or Codex can crop and resize images and join videos for you. See AI tools.
Video workspace
Opening a video keeps both the left queue and the Inspector visible, including when images and videos are mixed in the queue. The center preview sits above a resizable, scrollable tool dock. Drag the horizontal divider to change its height, double-click it to reset, or click Expand preview beside the Timeline and Captions tabs to hide the dock. Captions and Jump Cuts open their controls in the Inspector, so the timeline stays in view.
The project name, save state and file actions share the header row. Crop ratios and Browser frame stay in the row below it. Annotation layers share the main Timeline. Add new ones from the tool grid; select a layer and the Inspector shows Inspector · Layer, where the selected layer's style, motion and position settings sit below. Choose This layer, All layers or New layers in Style, then click a style swatch. See Video annotations.
The Inspector and Preferences
The right side is the Inspector. It shows the open file's name, size and format, then its settings: Optimize for, Output (format, max width, quality, file name, and More output for max height, file size and scale), crop, background, fill, smart crop and file size. Changes there apply to this file only; Use for all files makes them the default for every picture. It appears once you add a file.
The defaults every new file starts with are in Preferences (Settings on a Mac): click Settings at the top right of the window (Preferences on Windows and Linux), or press ⌘ Command + , (Windows and Linux: Ctrl + ,). Its tabs are General, Images, Video, Capture, Drop Zone, AI tools and Account. See Preferences.
Click a section's heading to fold it away. Cropped remembers which sections you folded. Drag the Inspector's left edge to make it wider; double-click the edge to put it back.
Optimize and save
The buttons at the foot of the Inspector run the export.
| Button | What it does |
|---|---|
| Optimize 3 files | Optimizes every file in the queue. Press ⌘ Command + ↩ Return (Windows: Ctrl + Enter). It reads Optimize & Save when videos are queued, auto-save is on, or export sizes are selected. |
| This file only | Optimizes only the open file. It shows when more than one file is waiting. When a video is the only file left, the main button reads Export video. |
| Cancel remaining | Stops a running batch. The × on the progress pill in the top bar does the same. |
| Save Results | Saves optimized files that aren't on disk yet (⌘ Command + S, Windows Ctrl + S). |
Files go to Downloads/Cropped unless you choose another folder in Preferences › General › Saving. When everything is saved, click Show in Finder to see them.
To send what you made, click Share link (Pro) at the foot of the Inspector, under Show in Finder. Anyone with the link can open it and comment. See Share from the Studio.
Keep working while it exports
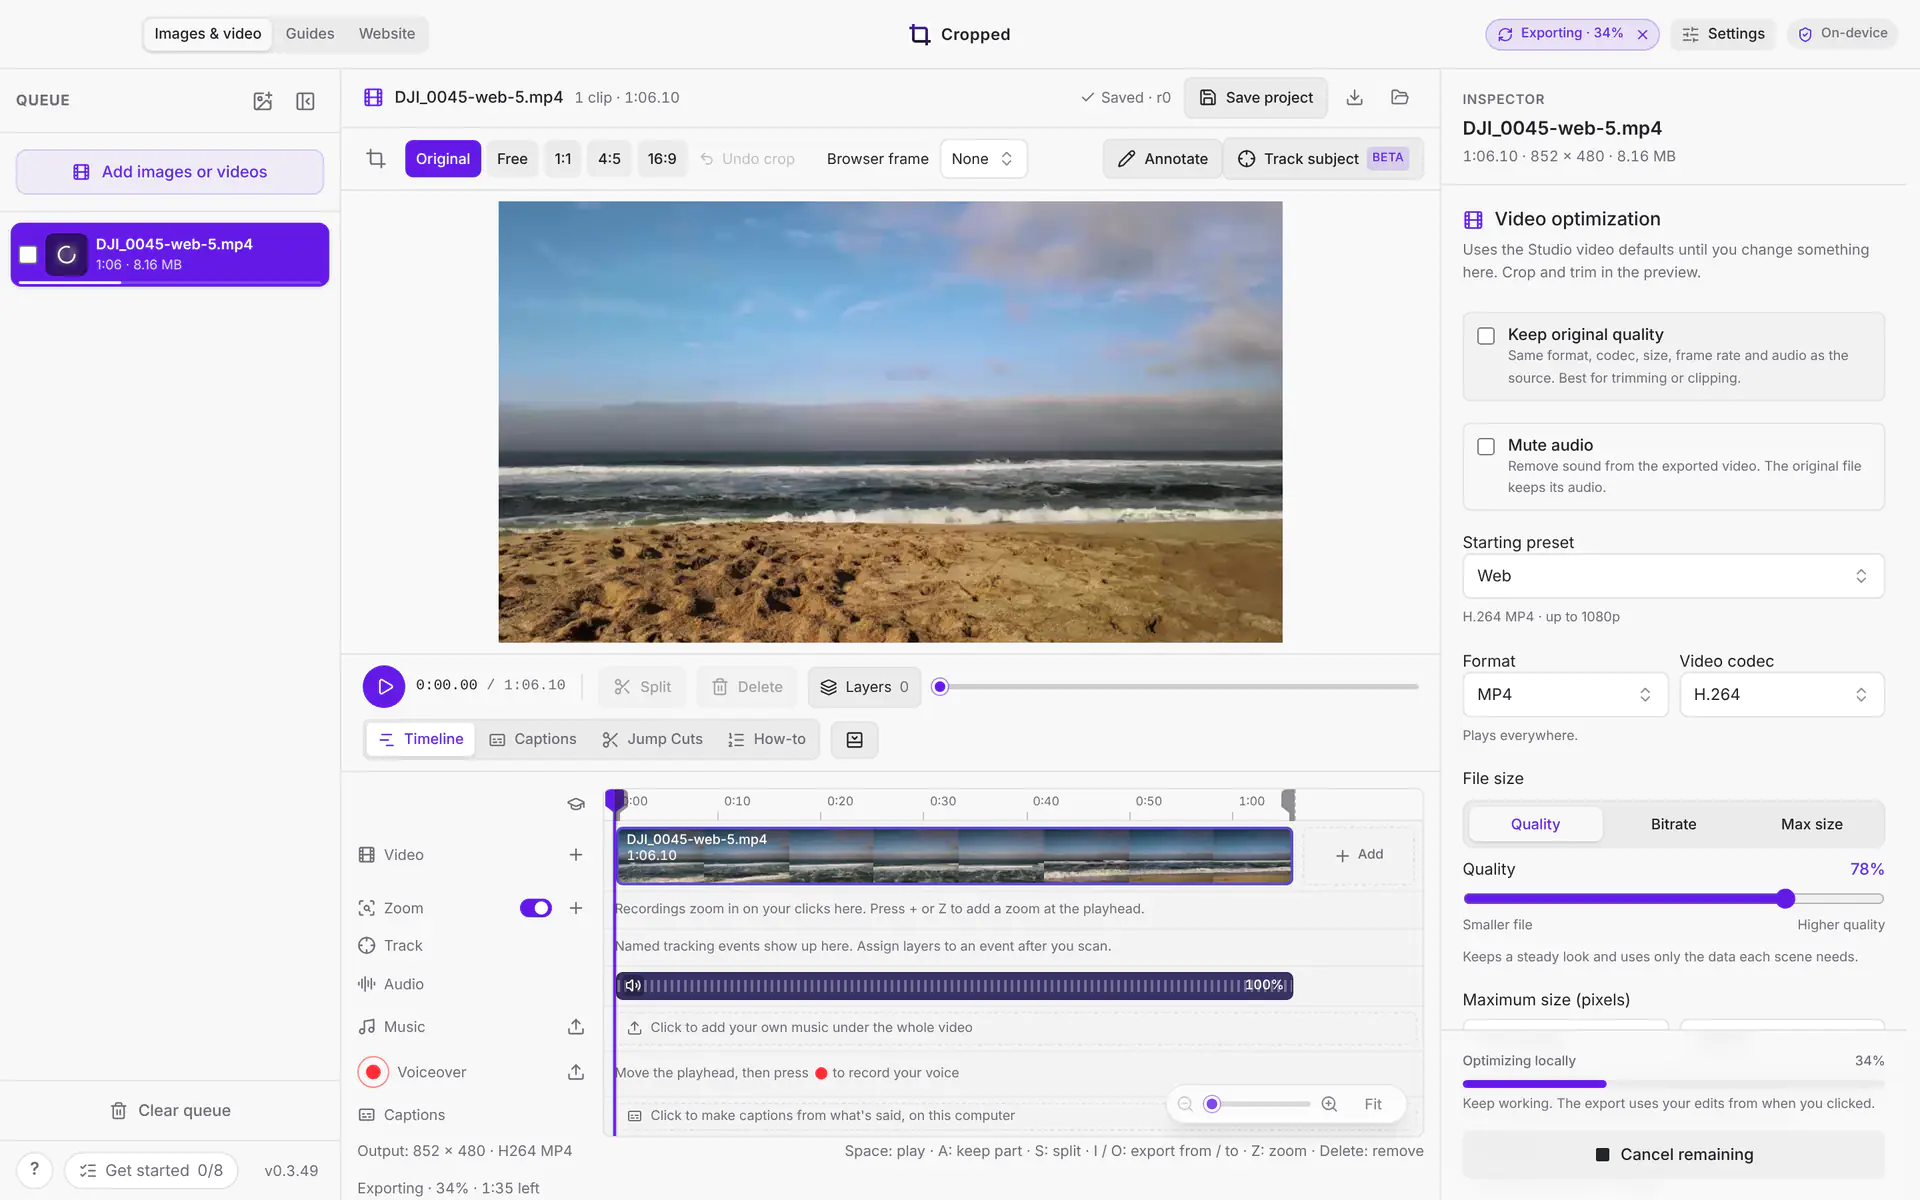
Optimizing runs in the background, so you can keep editing, add files or switch tabs while it works. A pill in the top bar shows how far along it is, with an × to cancel.
Each file exports as it was when you clicked. If you change a file after its export began, that export still saves the earlier version, and the Inspector asks you to Export again to include your newer changes. A file that is exporting can't be removed from the queue until it finishes.
Savings counter
After your first export, the title bar shows how much space you've saved this month, with a level that climbs from Starter through Kilobyte Kid to Tera Tamer. Hover it to see your total, your day streak and the badges you've earned: First Trim, Email Ready, Clean Cut, Format Explorer, 90% Club, Lean Week, Fifty Files and First Gigabyte.
Ask for help
Click the ? button at the bottom left of the Studio to ask a question. Cropped answers from this guide without leaving the app.
Still stuck? Click the ? button at the bottom left of the Cropped Studio to ask, send us a message, or request a feature.