 Cropped
Help
Help / Capture & annotate
Annotate screenshots
Point things out, explain a bug or hide a password before you share. The Annotate window opens on top of everything and saves a new screenshot, so the original stays as it was.
Quick answer: click a screenshot in the Drop Zone to open it in Annotate, pick Arrow, Box, Circle, Text, Draw, Focus or Hide, drag on the picture, then click Save. You get an optimized, annotated copy on your clipboard.
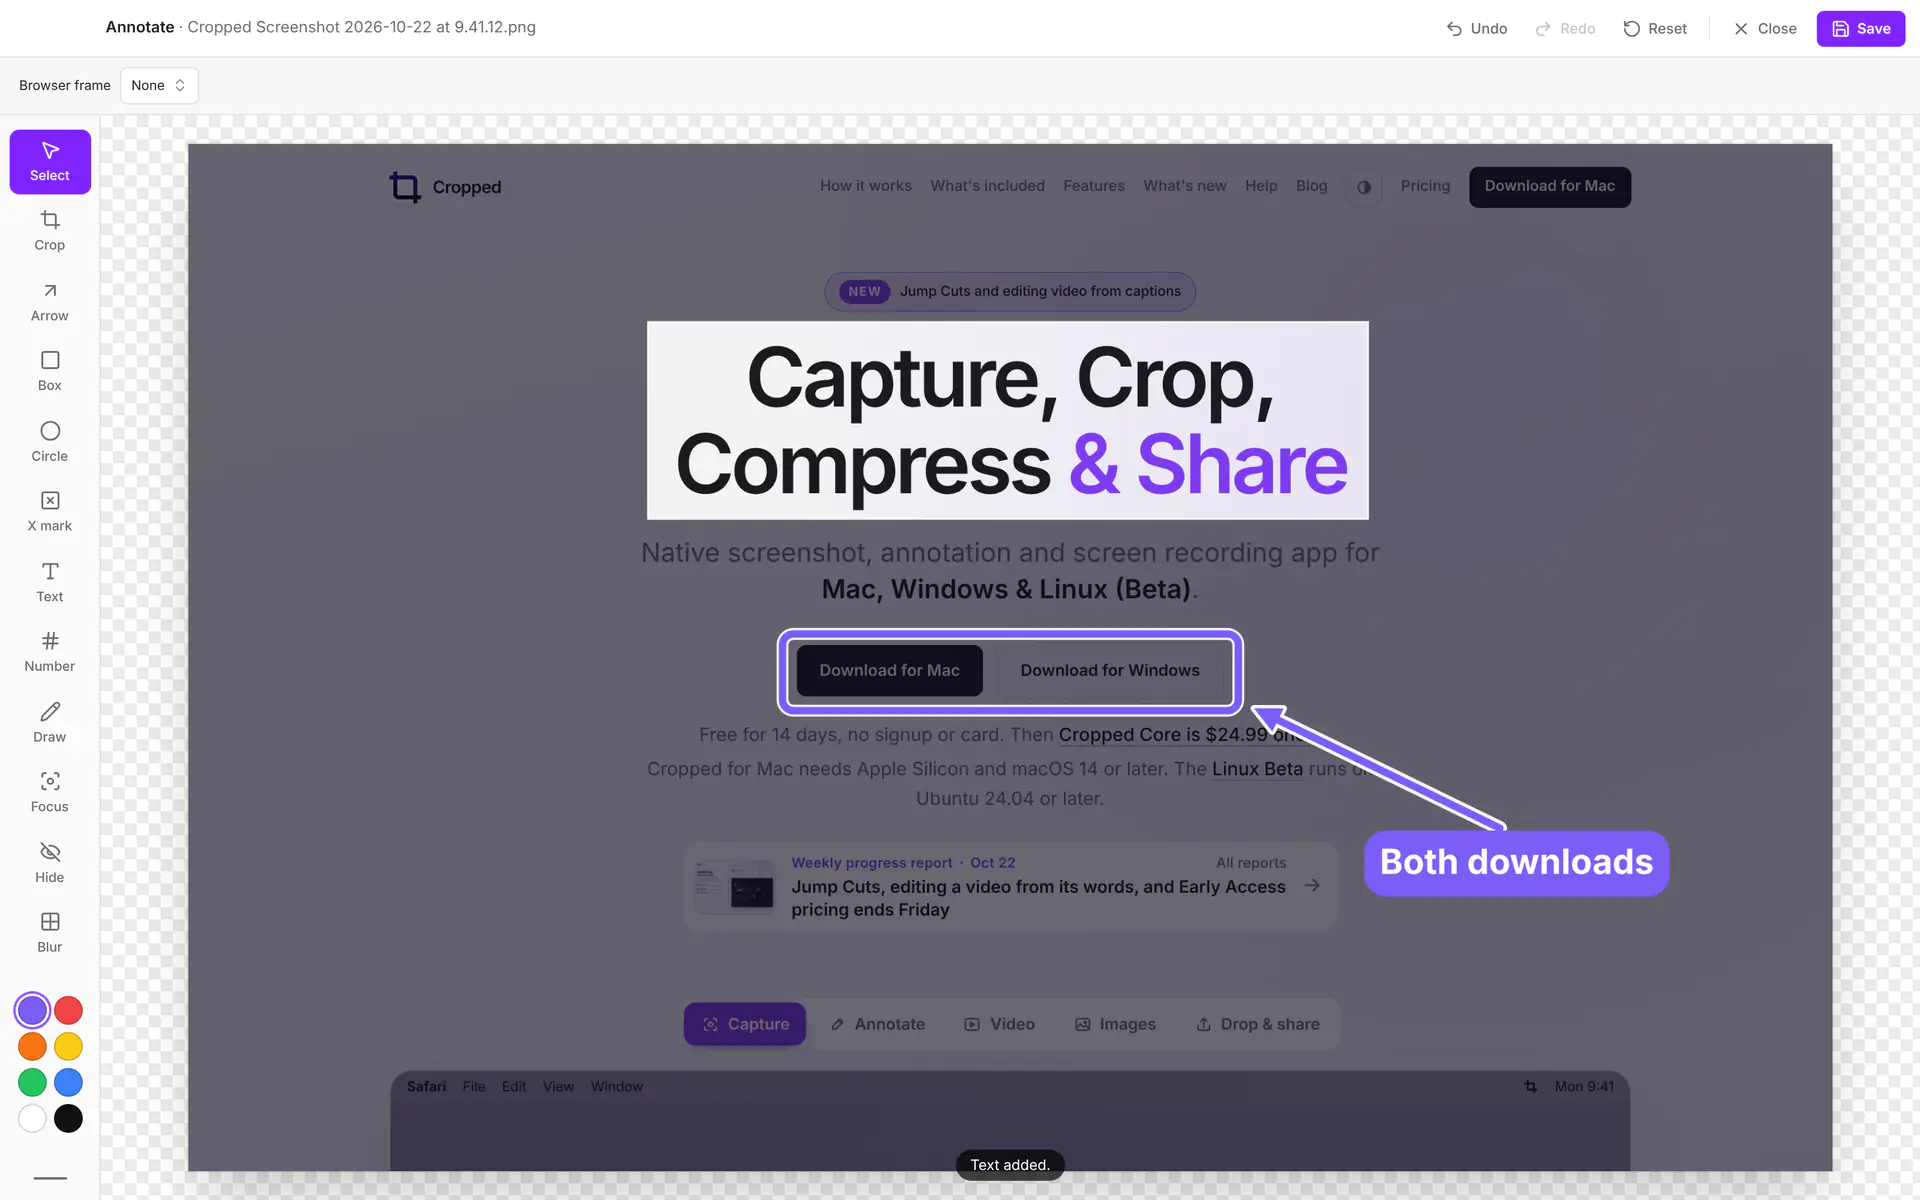
To open the editor after every screenshot, enable Open in Annotate in Drop Zone settings or App Preferences › Capture › Screenshots. The same toggle is also in App Preferences › Drop Zone; changing it anywhere updates the others. It works with area, window, full-screen and repeat captures. New captures wait while you finish your current annotation. See the capture workflow.
Open the Annotate window
Click any screenshot in the Drop Zone, or click Annotate on its card. For an image open in the Studio, click Annotate on the picture toolbar. The window title shows the file name.
Tools
Pick a tool from the list on the left or press its letter key. The tools are grouped into Basics, Shapes, Words and Privacy, each shows its key at the right, and the bar at the bottom says how to use the tool that's on.
| Tool | Key | How to use it |
|---|---|---|
| Select | V | Drag a mark to move it, drag its handles to resize it. Delete removes it. |
| Arrow | A | Drag from where the arrow starts to what it points at. |
| Box | R | Drag to draw a rectangle. Hold Shift for a square. |
| Circle | O | Drag to draw an oval. Hold Shift for a perfect circle. |
| X mark | X | Drag to cross something out. Hold Shift for an even X. |
| Text | T | Click where the text goes, type, then press Return. Long text wraps inside the screenshot. |
| Number | N | Click to drop a numbered circle. Each click counts up, and Return adds a label. See Number the steps. |
| Draw | D | Draw freehand. |
| Focus | F | Drag around what matters. Everything else is dimmed. |
| Hide | H | Drag over private details to cover them with solid black. |
| Blur | B | Drag over details to turn them into a coarse mosaic. The shape stays, the text is hard to read. |
| Crop | C | Shows a crop box. Drag its edges or corners, pick a shape, then press Return. See Crop a screenshot. |
Arrow is selected when the window opens.
To check the screenshot for contrast, small text and color blindness, click Accessibility Check at the top or press K. See Check a screenshot for accessibility.
Crop a screenshot
Pick Crop (C) and a crop box appears over the whole screenshot, with a grid and its size in pixels.
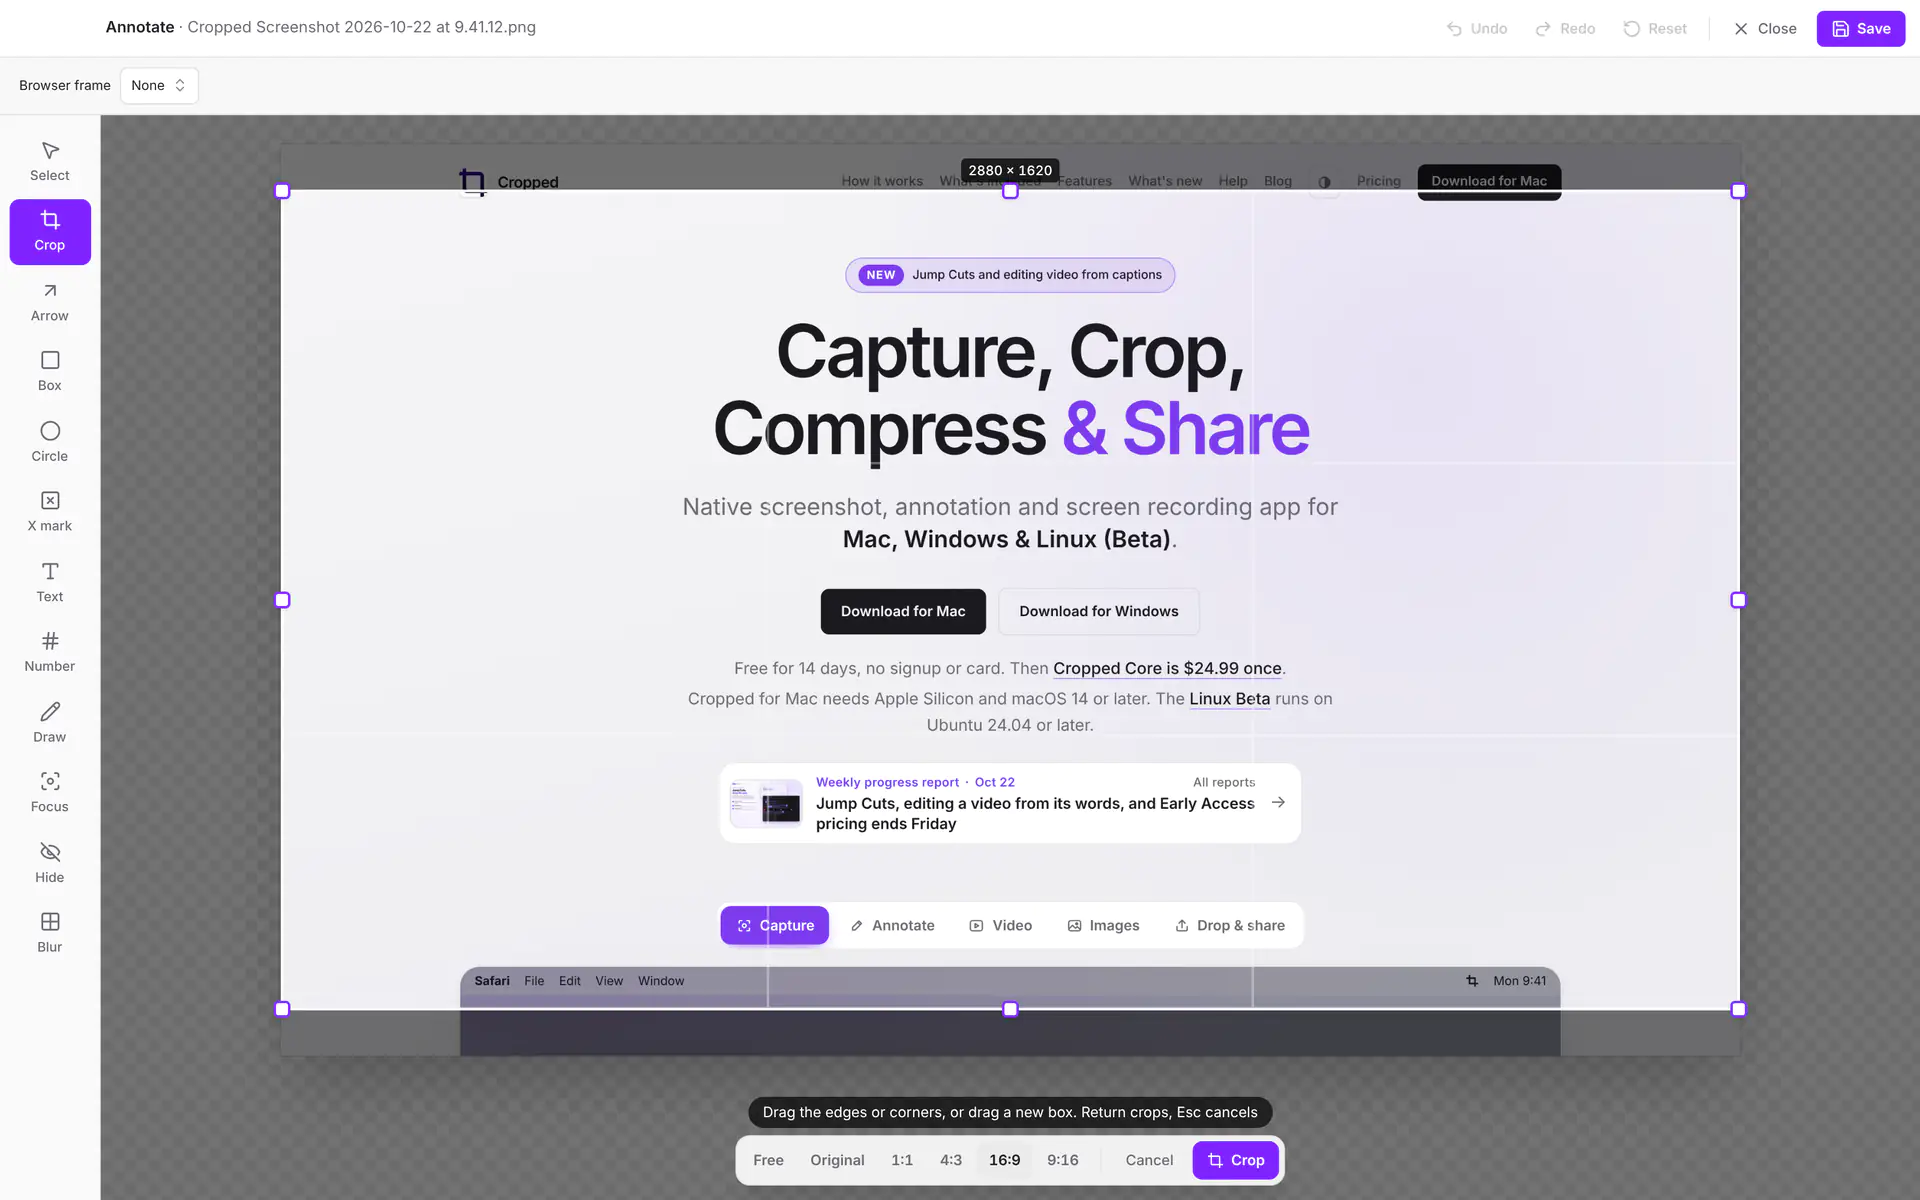
- Drag the edges or corners to fit what you want to keep, or drag a new box anywhere on the screenshot.
- Pick a shape in the bar above the picture: Free, Original (the screenshot's own shape, the default), 1:1, 4:3, 16:9 or 9:16.
- Press Return (Windows: Enter) or click Crop. Esc or Cancel leaves the screenshot as it was.
While dragging, hold ⇧ Shift to keep the box's shape (a square for a new box, one direction when moving it), ⌥ Option (Windows and Linux: Alt) to resize from the center, or both to do both. These are the same keys as the Crop editor and area capture.
Switching to another tool, or clicking Save, also applies the crop. Undo brings the rest of the screenshot back.
Text that fits the screenshot
Text always stays inside the picture. A label placed near the right or bottom edge moves in so it isn't cut off, and long text wraps onto new lines as you type.
- Drag the side handles of selected text to set where it wraps.
- Drag a corner handle to make the text bigger or smaller.
- Shift + Return starts a new line yourself.
Number the steps
Pick Number (N) and click where each step is. The first click places 1, the next 2, and so on. Delete the last badge and the next click uses its number again. Drag a badge to move it, or drag a corner to make it bigger or smaller.
To give a step a label, press ↩ Return right after placing its badge, or double-click any badge, then type and press ↩ Return. The label sits in a tag beside the number, styled to match it. Clear the text to remove the label.
Three looks, under Number style on the left while Number is picked or a badge is selected: Solid fills the circle in your color with the number in white or black, Ring outlines the circle with the number in your color, and Soft puts the number on a translucent chip, which stays readable on busy screenshots.
Hide passwords and private details
Pick Hide (H) and drag over anything you don't want to share, such as a password, an email address, a card number or a customer's name. Cropped covers it with solid black, so the hidden text can't be read or recovered from the saved file, unlike a blur.
Blur (B) turns an area into a coarse mosaic instead: it shows that something was there without showing what, which suits faces, names in a list or a chart you'd rather not share in detail. For passwords, keys and card numbers, use Hide: a blur can be coarse, but only Hide removes the pixels.
To draw attention instead of hiding, use Focus (F): drag around what matters and everything else is dimmed.
Color, size and text style
These sit under the tools on the left, and stay in the same place whichever tool is on.
- Colors: Cropped violet, red, orange, yellow, green, blue, white and black.
- Size: Small, Medium or Large. It sets the line width and text size.
- Text style (Text tool): Label puts white text on a colored tag. Plain draws colored text with an outline, which reads well on any background.
Change the color or size while a mark is selected to restyle that mark.
Zoom in
Zoom in to place a mark exactly, then fit the whole screenshot back in the window.
- Pinch on a trackpad, or hold ⌘ Command (Windows and Linux: Ctrl) and scroll. Zooming keeps the spot under the pointer still.
- ⌘ Command + = zooms in and ⌘ Command + − zooms out (Windows and Linux: Ctrl).
- ⌘ Command + 0 or Fit shows the whole screenshot. ⌘ Command + 1 or 100% shows it at its own size.
- Zoomed in, scroll to move around, or hold Space and drag. Dragging with the scroll wheel pressed works too.
The zoom controls are at the bottom right. Zooming only changes the view, never the saved screenshot.
Browser frame
Pick a frame under Browser frame on the left to put the screenshot in a Light, Dark or Minimal browser window. Click the pencil beside it to add an optional title and address. It's added to the saved copy; the original is kept.
Edit marks
- Move or resize any mark by grabbing its outline, in any tool. You don't have to switch to Select first.
- A new mark stays selected with its handles showing, so you can adjust it right away.
- Double-click text to edit it. Shift + Return starts a new line, and Esc cancels.
- Delete or Backspace removes the selected mark. Esc deselects it.
- Crop can be undone like any mark. Undo brings the rest of the screenshot back.
- Reset removes every mark and crop. Undo brings them back.
Save and share
Click Save (⌘ Command + S or ⌘ Command + ↩ Return; Windows Ctrl + S). Cropped saves the result as a new screenshot named like "Cropped Screenshot … edited.png", then optimizes and copies it like any capture. It appears in the Drop Zone, ready to drag into an app. Saving works while you are still typing text; the text is kept. A screenshot you haven't changed isn't saved again: Save then just closes Annotate and keeps it as it is, even with the Check panel open. Retina screenshots keep their resolution setting, so they show at the same size as the original.
Close the window with ⌘ Command + W (Windows: Ctrl + W) to leave without saving. If you have marks that aren't saved, Cropped asks first: Keep editing, Discard or Save. The window's own close button asks the same way.
Keyboard shortcuts in the Annotate window
| Action | Mac | Windows |
|---|---|---|
| Undo | ⌘ Command + Z | Ctrl + Z |
| Redo | ⇧ Shift + ⌘ Command + Z or ⌘ Command + Y | Ctrl + Shift + Z or Ctrl + Y |
| Save | ⌘ Command + S or ⌘ Command + ↩ Return | Ctrl + S or Ctrl + Enter |
| Close without saving | ⌘ Command + W | Ctrl + W |
| Delete selected mark | Delete | Delete |
| Deselect | Esc | Esc |
| Switch tool | V A R O X T N D F H B C | Same |
| Check accessibility | K | Same |
| Zoom in / out | ⌘ Command + = / ⌘ Command + − | Ctrl + = / Ctrl + − |
| Fit / actual size | ⌘ Command + 0 / ⌘ Command + 1 | Ctrl + 0 / Ctrl + 1 |
| Move around when zoomed | Hold Space and drag | Same |
Still stuck? Click the ? button at the bottom left of the Cropped Studio to ask, send us a message, or request a feature.